
Showing posts with label Phat Model. Show all posts
Showing posts with label Phat Model. Show all posts
Sunday, February 13, 2011


Sunday, August 22, 2010
PSP Advice - Removing The Power Switch Board
This is based on removing a power switch board from an original PSP (1000 series)
There are no screws attaching the power switch board to your PSP console, they simply click into place but there is one cable ribbon attached so please bear this in mind when removing. The only tool you will need is a small flathead screwdriver.
 First of all you need to take off the right hand shoulder button aswell as the metal clip in which holds down the rubber pad for said shoulder button. To remove the metal clip use your small flathead screwdriver and gently lift it up from where it connects to the PSP console.
When that is done you should then be able (with flathead screwdriver again) start to gently prise the PSP power switch board away, there is a small gap in which you can put your screwdriver to slowly lift it up. Do not lift up fully as it still has a ribbon cable attached, slowly turn over to one side and undo the brown cable clip, therefore releasing the cable and releasing the power switch board from your PSP console.
There are no screws attaching the power switch board to your PSP console, they simply click into place but there is one cable ribbon attached so please bear this in mind when removing. The only tool you will need is a small flathead screwdriver.
 First of all you need to take off the right hand shoulder button aswell as the metal clip in which holds down the rubber pad for said shoulder button. To remove the metal clip use your small flathead screwdriver and gently lift it up from where it connects to the PSP console.
When that is done you should then be able (with flathead screwdriver again) start to gently prise the PSP power switch board away, there is a small gap in which you can put your screwdriver to slowly lift it up. Do not lift up fully as it still has a ribbon cable attached, slowly turn over to one side and undo the brown cable clip, therefore releasing the cable and releasing the power switch board from your PSP console.
Tuesday, June 08, 2010
PSP Advice - Removing The UMD door
 A common PSP problem is a broken UMD door, it can quite easily happen, certainly if the PSP console has been dropped for example. Now first of all there are two screws that hold the UMD door in place and they are two of the seven screws as mentioned in previous post from the LCD screen housing plate. So basically when you have removed the LCD plate all you need to do is place the PSP console face down and gently slide your Flathead screwdriver as picture above shows into the bottom left hand side and slowly prise it away from the console. Once you have that side out you can then pull the other side free.
I have found this the easiest way of removing the PSP UMD door, I have read that you can also pry the hinge from the other side or just wiggle it free. You may find another way easier but the main thing is to take your time as on many occasion when I first started repairing PlayStation Portables I ended up breaking off parts of the UMD door and therefore needing to replace it, which at approx £4.99 for a new UMD door is not worst thing to break but nonetheless not ideal. Once you have removed the PSP UMD door you will then see the UMD game housing, of which we will go through in future posts on how to remove.
To replace the UMD door, just simply take your new door and slide it back down into its place, then re-attach the LCD housing plate with the relevant screws and your PSP console will again have a fully functioning UMD door.
PSP Advice - Removing The LCD Screen Housing Plate
The LCD screen housing plate / brace is what keeps the LCD tight and secure within your PlayStation Portable Console. The picture below shows what the plate looks like when the actual LCD screen has been removed. There are seven screws that you need to remove to enable you to take off the housing plate. There are three screws along the top and four along the bottom.

Once you have undone these screws, you then need to gently pry the housing plate outwards, with a small Flathead screwdriver separate the tabs between the D-Pad (where the directional buttons would be if the faceplate was attached) and the LCD housing plate. Once this is done slide the UMD door latch over so the UMD door comes open, as before gently prise the LCD housing plate from your PSP console.
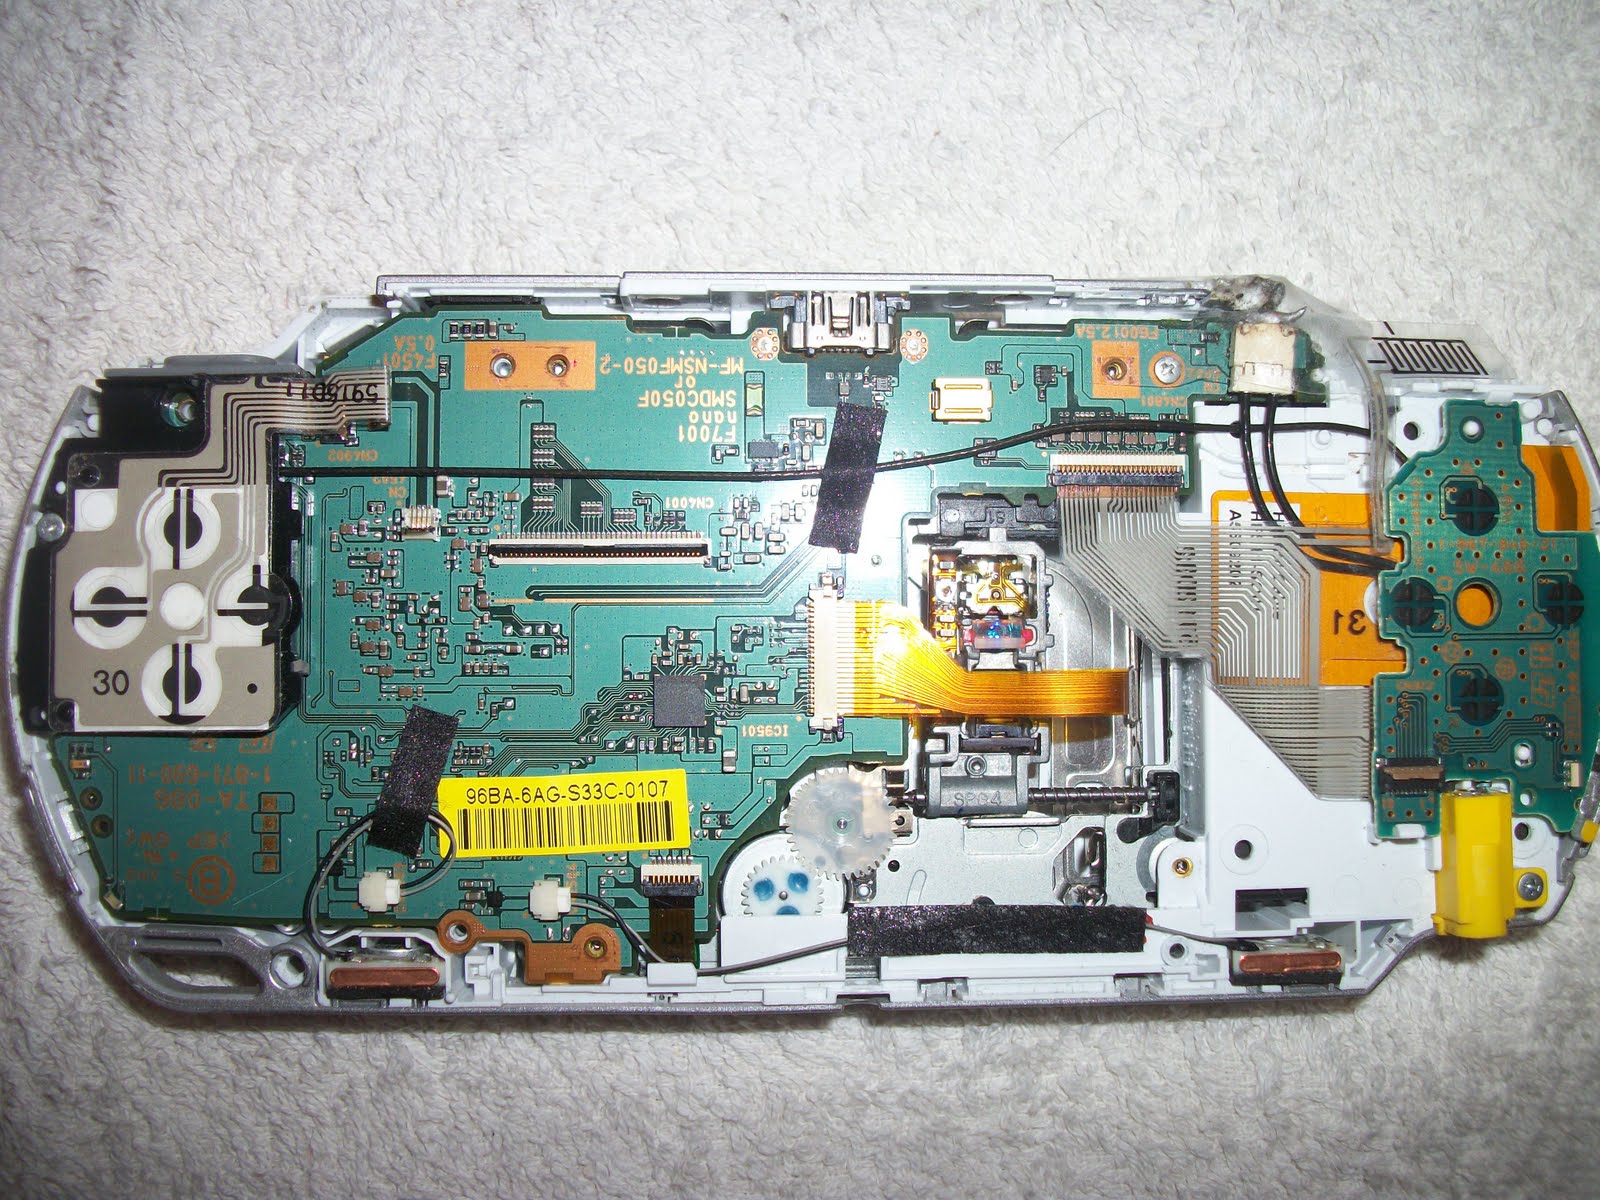
Once you have removed the plate, you will then have clear visibility of the MBO (Motherboard) as the picture shows above. From here you can then go on the fix / repair other parts of your PSP.
Saturday, May 22, 2010
PSP Advice - Replacing a PSP LCD screen
This post is based on replacing a LCD screen on an original PSP
Again for this you will need your trusty small Flathead screwdriver. Gently on the left hand side slide your screwdriver into the groove between the screen and the LCD housing as pictured below. There are two places to do this, one at the bottom left hand side and again on the top left hand side.
Again for this you will need your trusty small Flathead screwdriver. Gently on the left hand side slide your screwdriver into the groove between the screen and the LCD housing as pictured below. There are two places to do this, one at the bottom left hand side and again on the top left hand side.

Doing this will pop the tabs on the LCD housing bracket that is holding the LCD screen in place. You will then be able to lift the left hand side of the LCD screen up then gently pull the LCD screen so it comes out of the other side. Once this is done you can tilt the LCD screen so it sits upside down out of the metal LCD housing bracket as pictured below.

The screen is connected to the motherboard by two connector cables, but you have to be careful at this stage so that you do not pull the screen connector cables from there clips. This could damage both the screen cables and the clips on the motherboard, then a simple repair turns into a major one.
The larger cable flex is for the screen itself, the smaller one is for the back light. With your Flathead screwdriver lift the connector clips and this will then release the LCD screen. Again be gentle doing this, too much pressure and you could damage the clip.

If you are replacing your LCD screen simply take the new one out of the packet, place the screen cable flex's back in the connectors, the back light cable flex needs gently pushing in with the screwdriver, if you look closely at one it has little arms on the side which you can use just to slide in. Once the cables are in just do the reverse of above instructions and you will then have a fully functioning PlayStation Portable. If you are removing the screen to carry out another repair, place the screen face down on the PSP faceplate, this will then keep it free of dust and scratches etc.
PSP Advice - Removing The PSP Button Bar
The button bar is the silver strip along the bottom of your LCD screen which enables you when the faceplate is intact to press the home, volume, screen darkness, mute, select and start buttons. If for some reason one of them particular buttons is not working you will need to replace the button bar. Generally though if you want to do any repairs on your PSP such as replacing a broken LCD screen you will need to remove the button bar anyway.

As you look face down as per the picture above, at your PlayStation Portable, you will need your small Flathead screwdriver just to gently slide underneath the button bar and slowly lift up until it comes away from the LCD housing plate.

The button bar has flex cable attached which is connected at the above point on the PSP power switch board, all you need to do is gently lift the connector clip and pull out the button bars flex cable, again use the small Flathead screwdriver the lift the clip. These connector clips can break easily if you use excessive force, so do take your time. Once you have unclipped the button bar, put it in a safe place and then you can continue on to remove the LCD screen.
Saturday, May 01, 2010
How To Open a PlayStation Portable (1000 series)

This post is based on opening up an original PSP console (1000 series)
There are seven screws that will need to be un-done for you to open up your Sony PlayStation Portable device. First of all put your console screen side down on a soft and clean surface as pictured to the left (to avoid scratches to the faceplate screen)and also ensure there is no memory stick or UMD in your device before starting.
There are four screws in the battery compartment, you will need to remove the battery cover and of course the battery, once completed you will see two of the four screws. You then need to remove the warranty sticker which is generally the smaller of the two stickers that you find in the battery compartment. Underneath the warranty sticker you find the other two screws.
If your PSP is still under warranty then please do not remove the sticker, as it will make the warranty void. If you have an issue with your PlayStation Portable and it is under warranty then you can send it to Sony and they should sort the problem with no charge, send it back with the warranty sticker removed or tampered and they will charge you to have it fixed and I can imagine that would not be cheap.
There are another two screws on the other side of the UMD door, please note these two are generally the trickiest screws to remove as there are deeper within the back faceplate, you need to use a longer arm screwdriver or you risk damaging the back of your PSP.
The last screw is on the bottom of the console. Once you have removed all seven of this screws you can then gently remove the front faceplate, this will then reveal the actual LCD screen and power switch board etc.
It is important to keep all your screws organised so you know where each of them belong, otherwise your PSP will not go back together correctly.
Also try not to be to forceful when removing the screws, if you do the screw head will loose shape and you may not be able to get it out at all. This also applies when putting the screws back in.
Hope this has been of some help.
Subscribe to:
Posts (Atom)